SSH key-based authentication
While the most common way of login to the HPCC is by using the username/password pair, a more secure authentication method is the use of SSH keys. Although setting up your keys is a little more complex, it is a one-time investment. The HPCC provides key-based authentication as an option, in addition to the usual password-based login.
Note
Starting in October 2022, login to our rsync gateway (rsync.hpcc.msu.edu) will accept SSH keys as the ONLY authentication method. Username/password won't work.
What are SSH keypairs?
An SSH keypair consists of a private key and a public key. Your private key is a secret key just like your password which you should not share with anyone. On the other hand, your public key can be made publicly available in the same way that your name can be made public. The public key is stored on the server you attempt to log into (that is, the HPCC), while the private key is stored on your own computer. When a user attempts to log in, an encryption process starts on the HPCC side, using the public key. With your private key, your computer will be able to decrypt the encrypted message sent from the HPCC. When everything matches up, your login is approved.
Steps
Generate an SSH keypair
We recommend Windows users use MobaXTerm to generate and manage their key pairs. If you are Windows user who is not comfortable with the command line, the following instructions will guide you through using Graphical User Interface (GUI) tools built into MobaXterm which should work similar to other Windows applications. Please follows these instructions carefully as each step is important to ensure your keys are created using the proper format for use with HPCC.
In MobaXTerm, click Tools -> MobaKeyGen (SSH Key Generator) in the menu bar. You will see the following window:
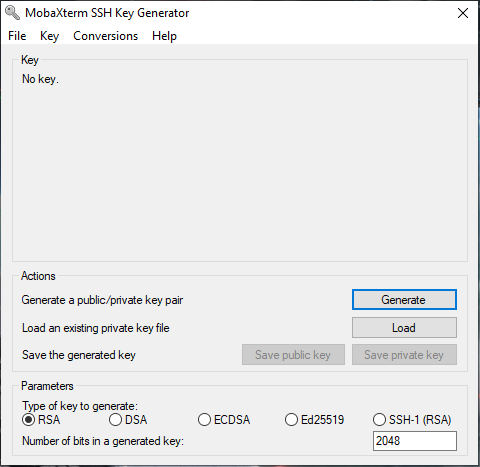
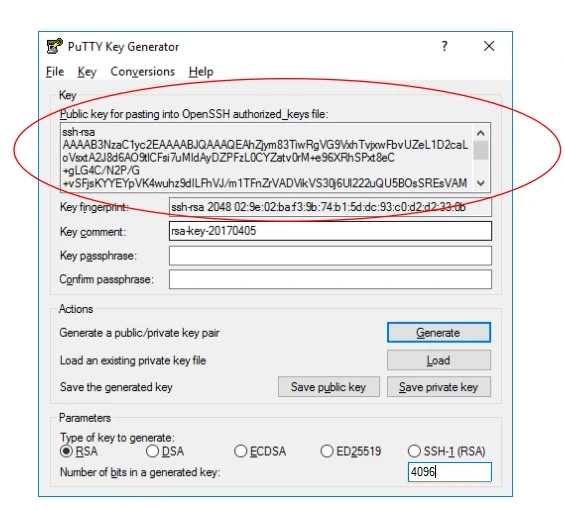
Click Generate and follow the commands on the screen. The Parameters should be set to RSA, Number of bits 4096. The Key comment field can be used to enter a description of the key e.g. "My home PC". We also recommend adding a key passphrase to secure your key.

Save the private key to your computer by going to the Conversions menu at the top of the screen, and selecting "Export OpenSSH key". Save the resulting file in C:\Users\<Account_Name>\.ssh\id_rsa where <Account_Name> is your Windows account name. Create the .ssh directory if it doesn't already exist.
When uploading your public key to the HPCC in the next section, copy the public key from the MobaKeyGen window. Make sure you copy all of the characters.
Note
If you use "Save public key", the file will not be in the correct format.
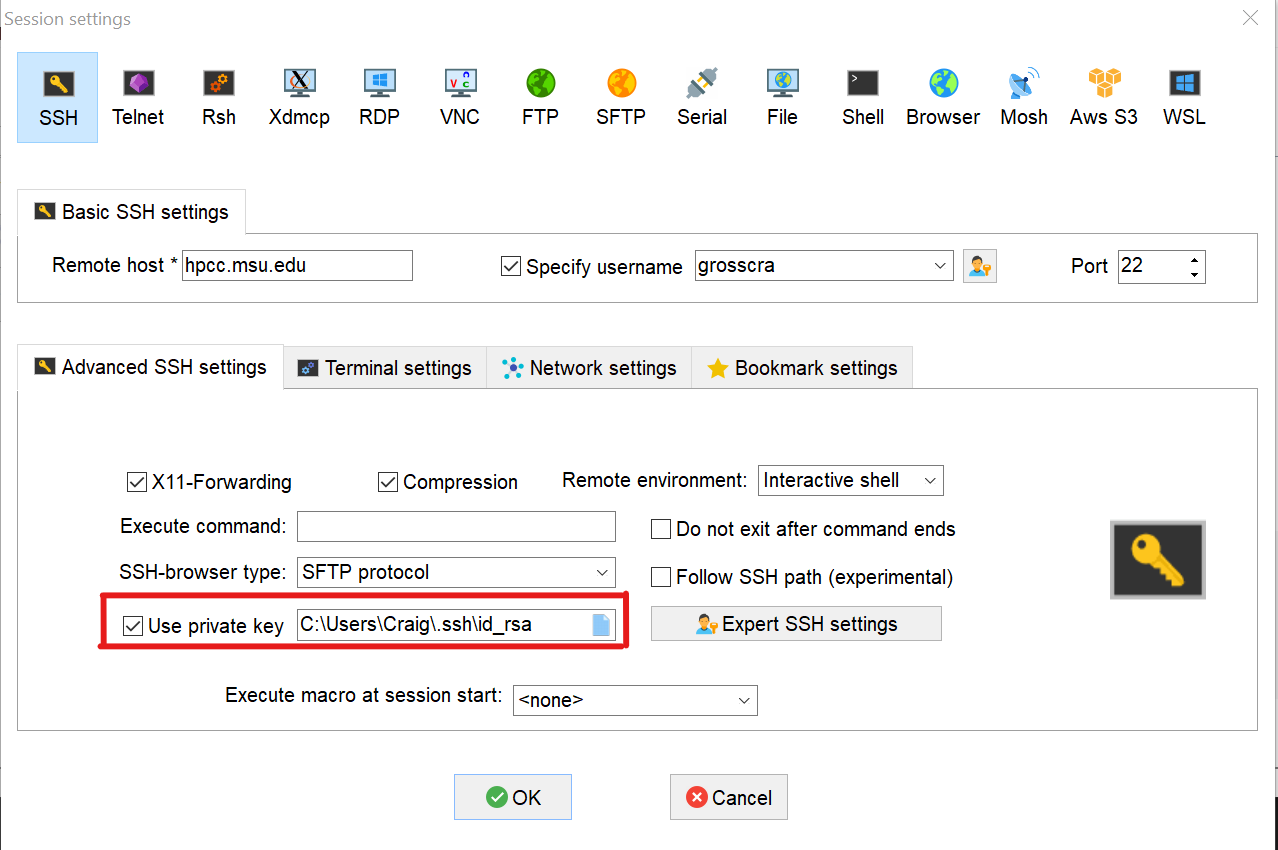
Back in the MobaXTerm window, in the User sessions pane, right click the link you use to connect to the HPCC (usually something like hpcc.msu.edu (<netid>)), and select "Edit session". In the "Advanced SSH settings" pane, click "Use private key", and add the path to the key file you saved in C:\Users\<Account_Name>\.ssh\id_rsa. Click "OK" to save.
Note
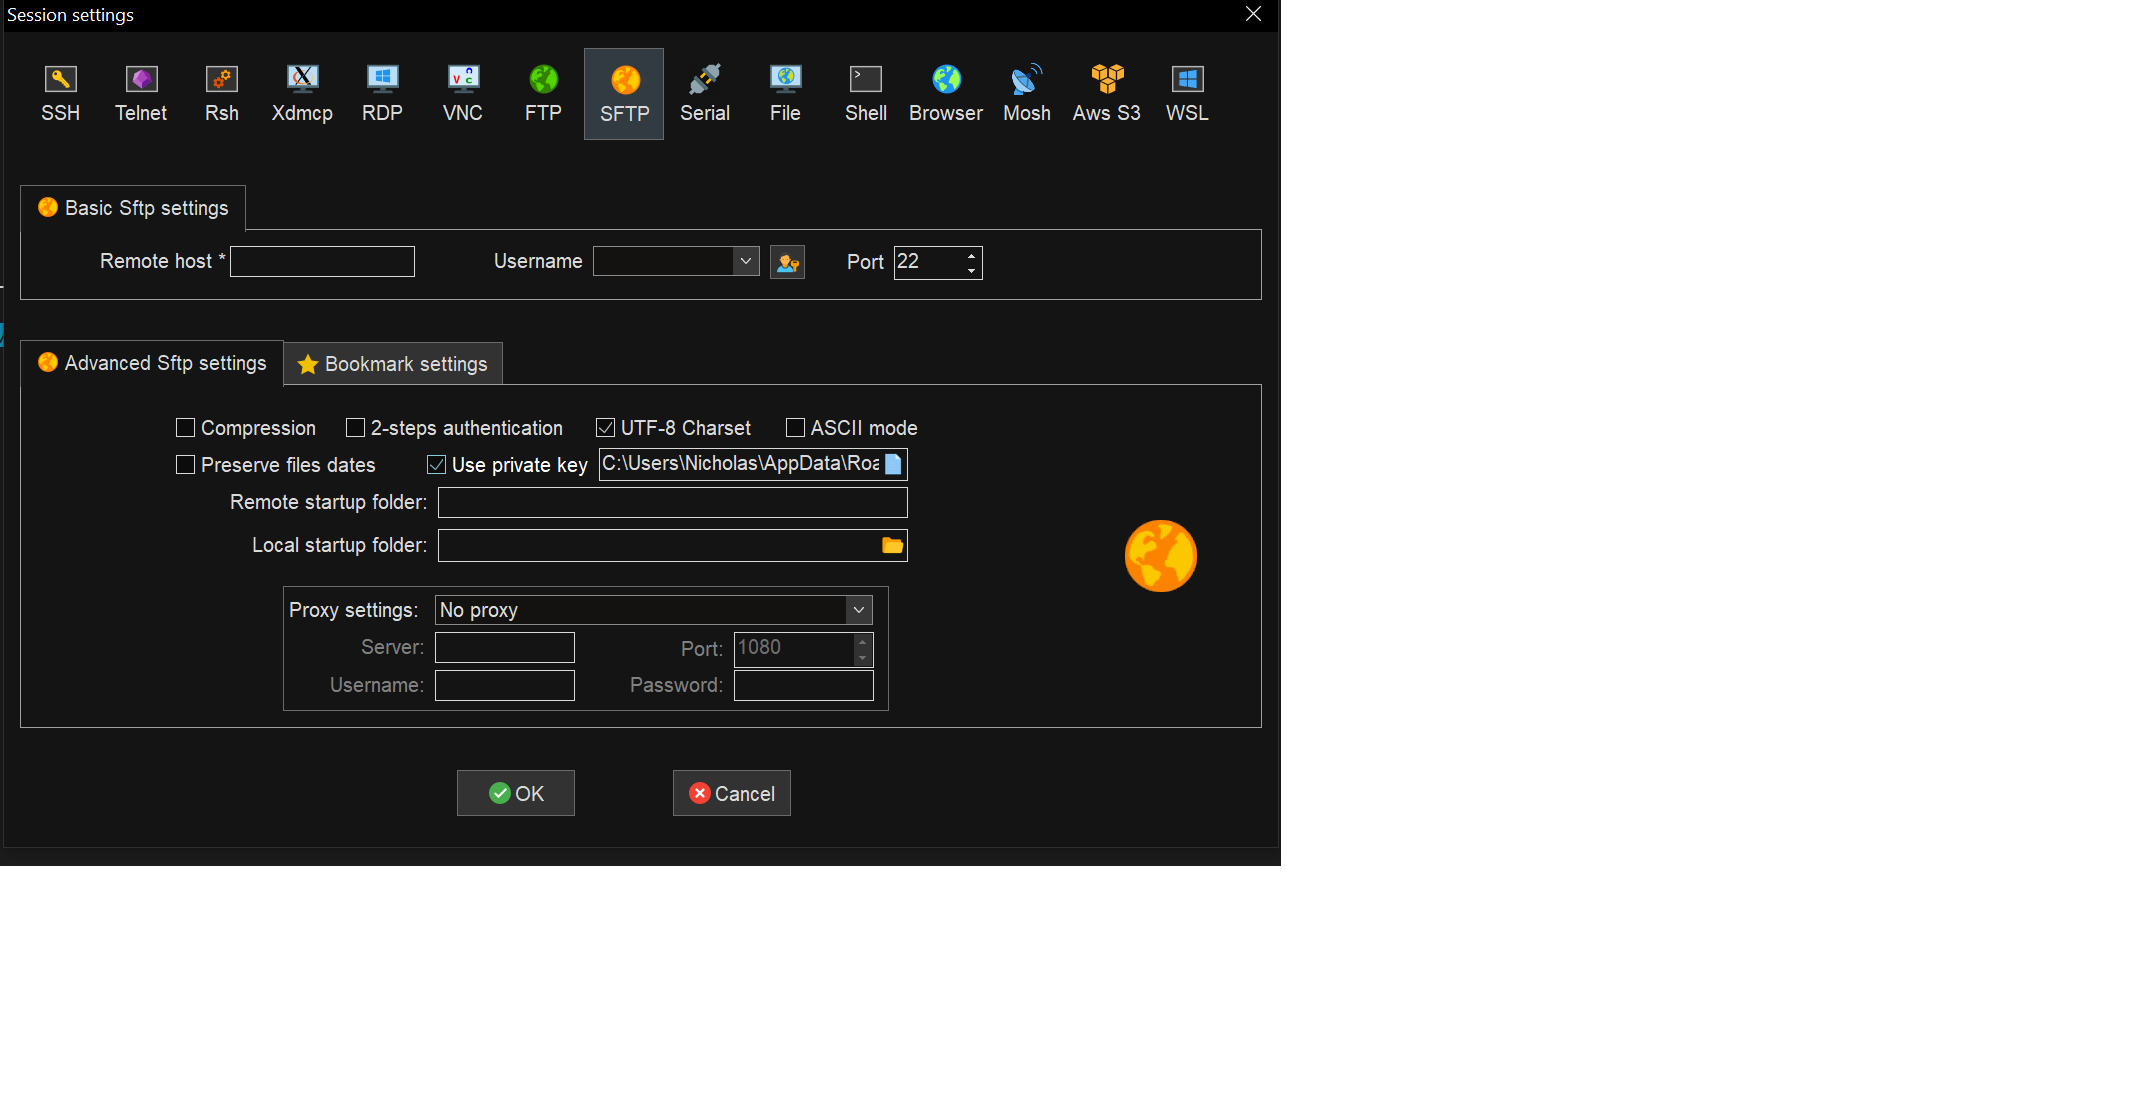
If you are having trouble connecting with an SFTP session in MobaXterm to rsync.hpcc.msu.edu, make sure you check the "Use private key" box and point towards the private key (id_rsa) file which should be in either:
C:\Users\<Account_Name>\AppData\Roaming\MobaXterm\home\.sshif you used command line orC:\Users\<Account_Name>\.sshif you use the the GUI tool
-
Start a command line on your personal computer:
- Click the Launchpad icon in the dock, search for the Terminal application, and click Terminal
- In the Finder, open
/Applications/Utilitiesand double click the Terminal
- Install MobaXterm
-
Start MobaXterm and choose the "Start local terminal" option:
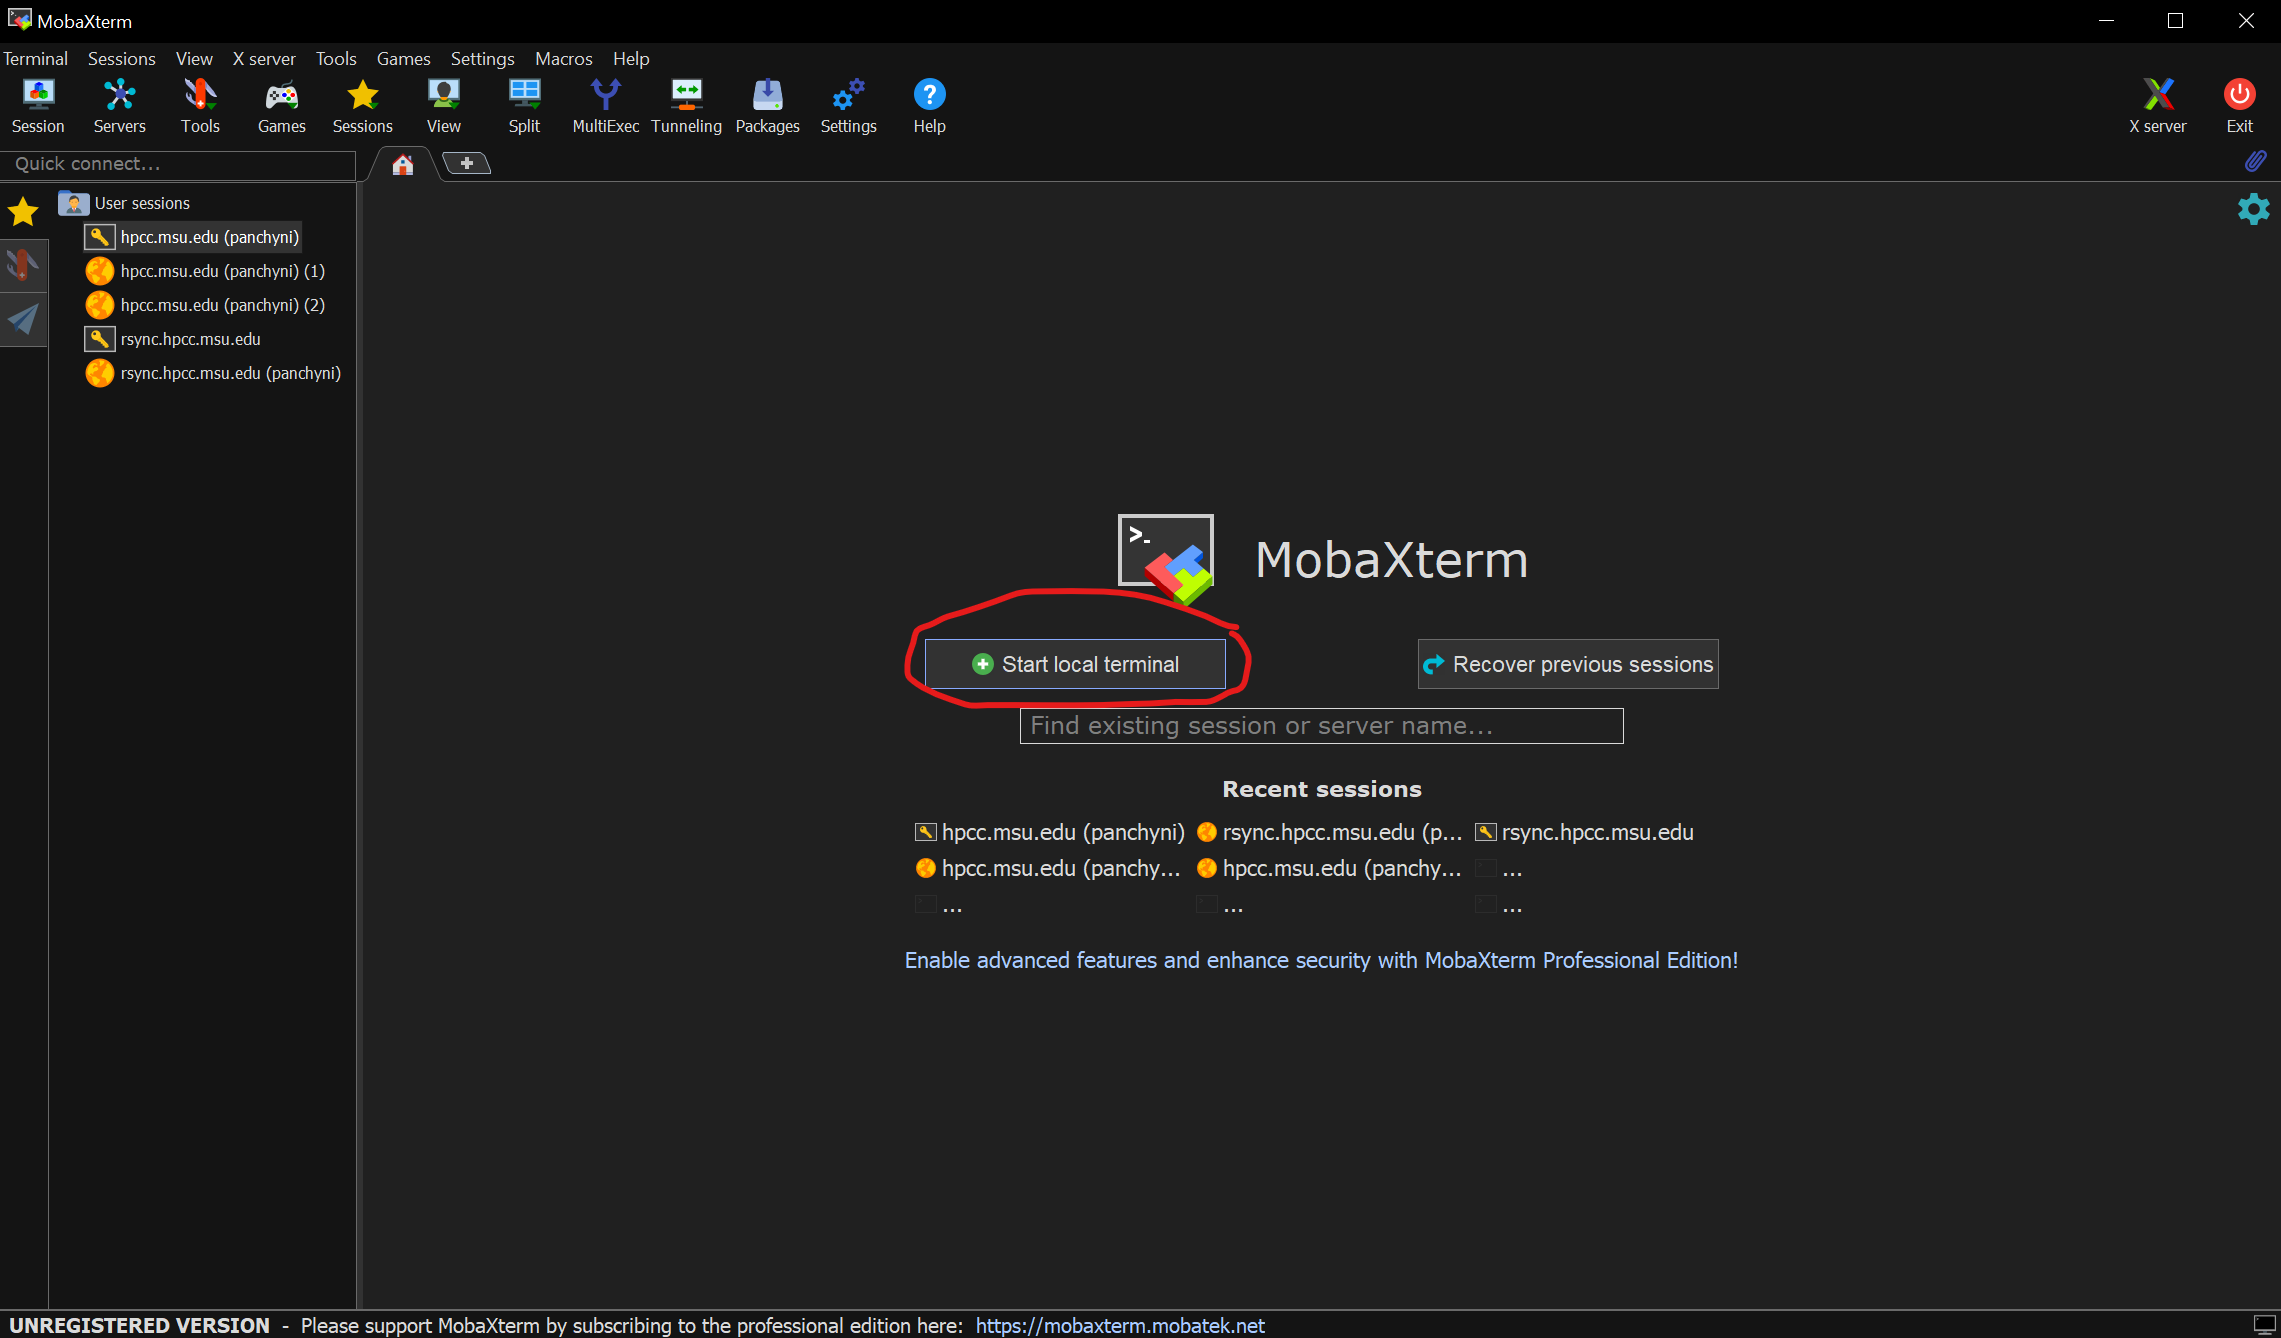
This will depend on your desktop environment and terminal name, but usually you can search for "Terminal" in your applications.
-
Generate a keypair:
ssh-keygen -t rsa -b 4096You will be given an option for protecting your private key with a passphrase. Please do this, as it will prevent your private key from being used by a malicious individual if it is ever stolen.
After you have set a passphrase and the keys have generated, you will find the both the public and private key files in the
.sshdirectory under your home directory. By default,id_rsais the private key file andid_rsa.pubthe public key file.
Upload your public key to the HPCC
- Log into the OnDemand web portal.
- From the Files dropdown at the top of the screen, click SSH Key Upload under the Utilities section.
-
Copy the public key from your personal computer. If using MobaXterm graphically, you should already have copied this in the last step of that section. If you used the command line, type
cat ~/.ssh/id_rsa.puband copy the output.Warning
Only copy key files with the
.pubextension. Key files without this extension are private keys, which should never be shared! -
Paste into the text box, and click Upload.
Warning
This option can only be used if you are able to log in using your password on the command line. If not, please use the steps in the other tab "Graphically via OnDemand".
To copy your key to the HPCC, run the following command, replacing <netid> with your MSU NetID:
ssh-copy-id -i ~/.ssh/id_rsa.pub <netid>@hpcc.msu.edu
Enter your MSU password when prompted. Note that the command line will stay blank while entering your password (i.e., no text or stars will be shown).
Try logging in to the HPCC via SSH to verify that you do not need to enter your MSU password. You may be prompted for your SSH key passphrase if you set it when creating your SSH keys.