Running Jupyter Notebooks on the HPCC through VS Code
VS Code supports Jupyter notebooks. This how-to guide will show you how to run these notebooks on the HPCC while using VS Code on your personal/local computer.
Prerequisites
- You'll need to connect VS Code to the HPCC over SSH. Pay special note that this requires setting up SSH tunneling.
- Building off the SSH tunneling needed for the previous step, you'll also need to set up tunneling to compute nodes.
- (Optional) Set up SSH keys to connect to the HPCC without needing to enter a password. For Windows users, use the MobaXterm GUI instructions (or ensure that your private SSH key is saved to
C:\Users\<Account_Name>\.ssh\id_rsa). - Install either the
jupyterpackage or (if you don't plan on using Jupyter through OnDemand) theipykernelpackage to the Python environment you plan on using. We recommend installingjupyterto avoid future confusion. - Install the Python and Jupyter extensions in VS Code.
Start an Interactive Job
If we want to run Python and/or Jupyter on the HPCC, it's best to do so from an interactive job. This will give us a compute node on which to run our calculations. While a development node may seem more convenient, remember that jobs using more than 2 hours of CPU time are automatically cancelled! For example, we can request a single CPU for four hours:
salloc -t 04:00:00 --mem=4GB
Once your interactive job starts, run the command hostname; e.g.
bash-4.2$ hostname
lac-046
Connect VS Code to the Interactive Host
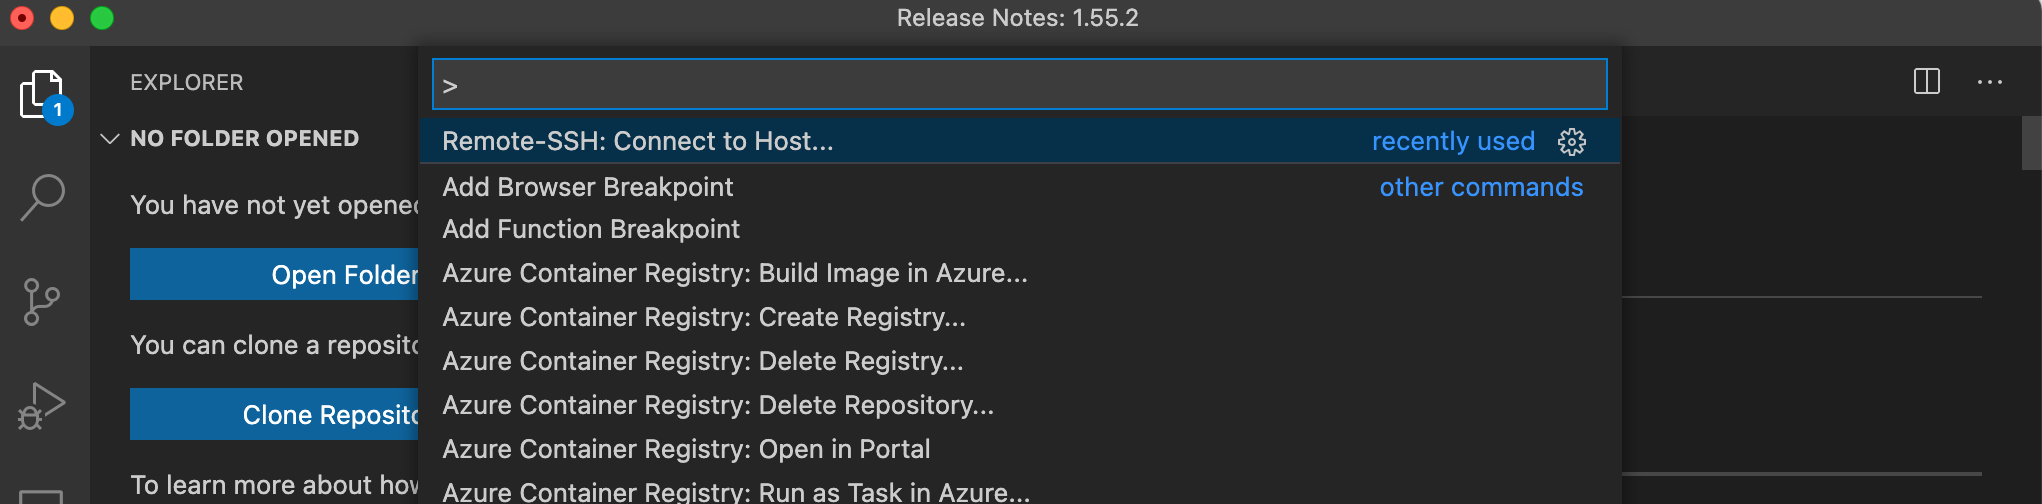
Inside VS Code, press F1 and select 'Remote-SSH: Connect to Host...' You may need to start typing this option to get it to appear.
Note
If this option is not available, please follow the steps in this how-to guide.
Instead of selecting a host from the drop down list, enter the host of your interactive job into the textbox.

A new VS Code window will pop up. Follow any of the prompts that follow, selecting "Continue" and "Linux" as applicable. When you are successfully connect, the bottom left of the VS Code window will show the hostname you just connected to. You may open files and folders as you normally would when connecting VS Code with SSH.
Set your Python Kernel
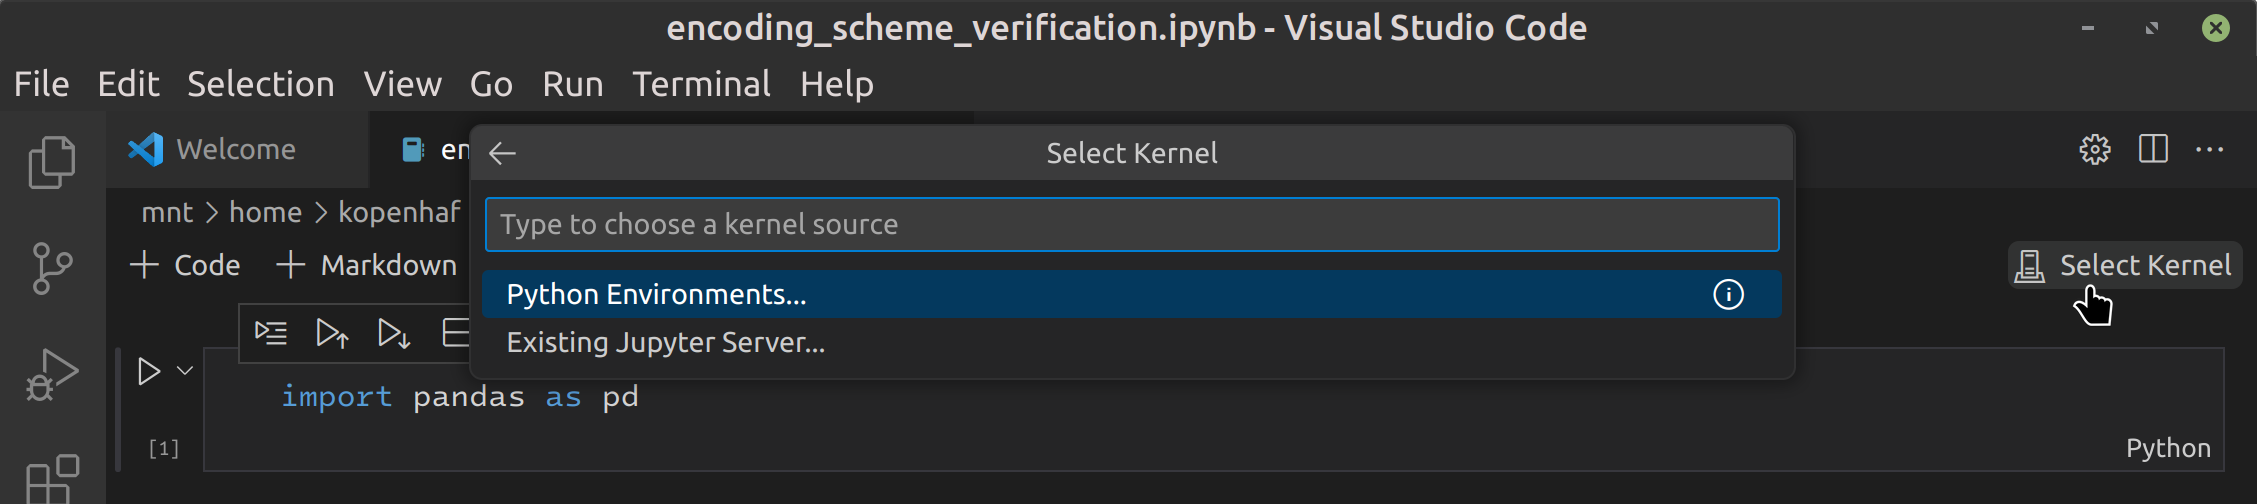
Open an existing Jupyter Notebook file or create one by going to the File menu, selecting "New File..", and choosing the "Jupyter Notebook" option. With your Notebook open, click "Select Kernel" in the upper right and then choose "Python Environments." If a Kernel was automatically chosen for you, you'll first need to choose "Select Another Kernel."
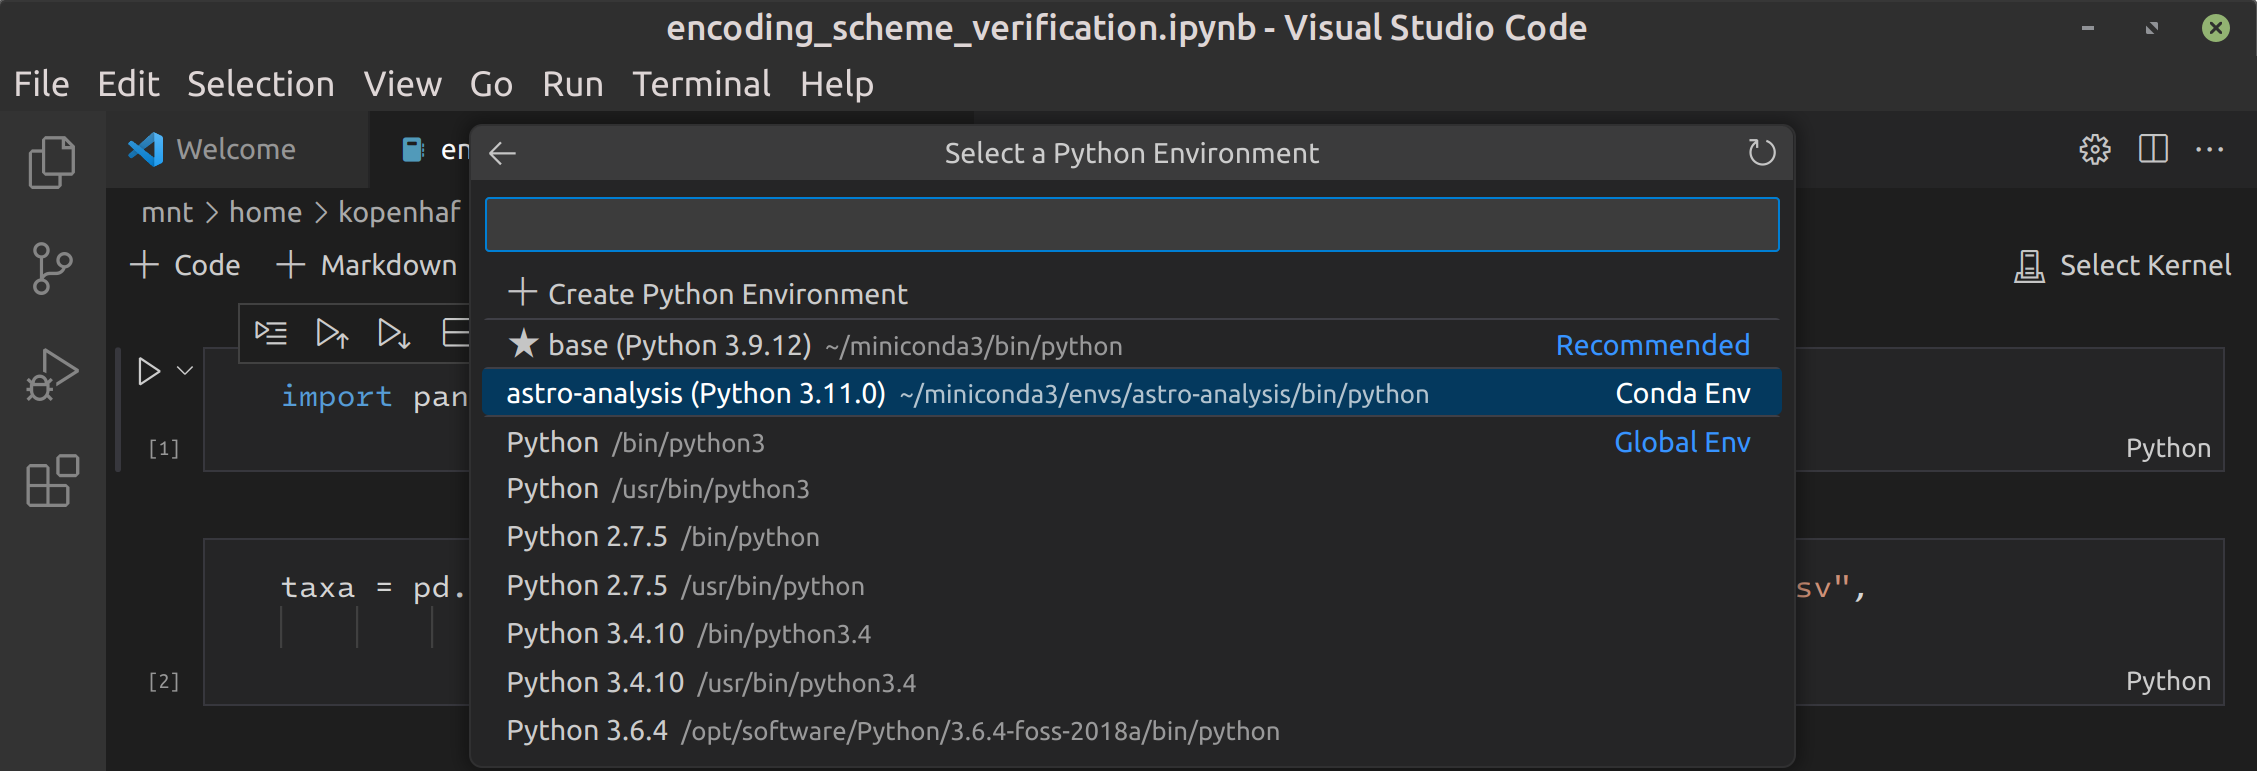
Pay attention to the paths given for each entry.
In the screenshot below, for example, the "Recommended" Python interpreter corresponds to the base Conda environment. We can also see our other Conda environments (in this example, there is only one called "astro-analysis") as well as system installations of Python in /bin, /usr/bin, and /opt/software. These system installation are likely not the Python versions you want to use.
You may now execute cells in your Jupyter Notebook while running on the HPCC! VS Code will remember your choice of kernel next time you open that workspace.
Resolving package conflicts with Conda environments
ICER provides default Python modules on the HPCC. These modules include a variety of Python packages that may cause conflicts with your Conda environment when it is executed in a Jupyter Notebook. An example error may be:
Exception: Version mismatch: this is the 'cffi' package version 1.15.1, located in '/opt/software-current/2023.06/x86_64/intel/skylake_avx512/software/Python-bundle-PyPI/2023.06-GCCcore-12.3.0/lib/python3.11/site-packages/cffi/api.py'. When we import the top-level '_cffi_backend' extension module, we get version 1.17.1, located in [your environment path] The two versions should be equal; check your installation.
To resolve this, you can launch your Jupyter server from the VS Code terminal.
- Open a VS Code terminal on the HPCC where you wish to run your notebook.
-
Run the command
module purgein the VS Code terminal to unload all modules.Note
If you get
module: command not foundsee our guide for resolving. -
Run the command
module load Miniforge3to activate the Conda module. - Activate your environment with
conda activate. - Create a Jupyter server with the command
jupyter notebook --NotebookApp.allow_origin='*' --NotebookApp.ip='0.0.0.0' --no-browser - VS Code may pop up a notice that you can connect to the port. You should ignore this.
- Copy the URL into the notebook kernel selector, following the instructions provided by VS Code.
You can end the server in your terminal by using Ctrl+C and then typing y.