(2022-12-20) Lab Notebook: SSHFS mapping on Windows
Warning
This is as a Lab Notebook which describes how to solve a specific problem at a specific time. Please keep this in mind as you read and use the content. Please pay close attention to the date, version information and other details.
Lab Notebook --- Mapping HPCC Drives with SSHFS on Windows (2022-12-20)
Warning
EXTRA WARNING: This information was removed from the main SSHFS documentation after switching rsync.hpcc.msu.edu over to SSH key authentication. This process is now much more difficult, less stable, and can no longer support convenient software like SSHFS-Win Manager. As such we no longer plan to update or support these instructions and they mainly exist for archival purposes and for users who prefer this approach. Users are free to use this approach and their own risk, but we recommend other drive mapping and file transfer options.
-
Install the latest stable release of
winfsp. The .msi installer package is recommended. WinFsp release list- Full upstream documentation: WinFsp Documentation
Note
Administrative access is required
-
Install the latest stable release of SSHFS-Win.The .msi installer package is recommended. SSHFS-Win release list
- Full upstream documentation: SSHFS-Win Documentation
Note
Administrative access is required
-
You will need to generate an authentication key pair by following the directions at SSH Key-Based Authentication. Follow the instructions for Windows as described for uploading your key to HPCC, but additionally you will need to created a folder on your Windows system at C:\Users\
called .ssh. Inside this folder use Notepad (NOT Office) to create a file named id_rsa.pub and copy your public key from the MobaKeyGen window into that file. Finally, go to the "Conversions" tab in the MobaKeyGene windows and click "Export OpenSSH Key" as save that as id_rsa in the same folder (C:\Users\ .ssh). DO NOT use the "Save public/private key" buttons to save the keys in C:\Users\ .ssh as these will NOT save the key in the proper format for SSHFS. 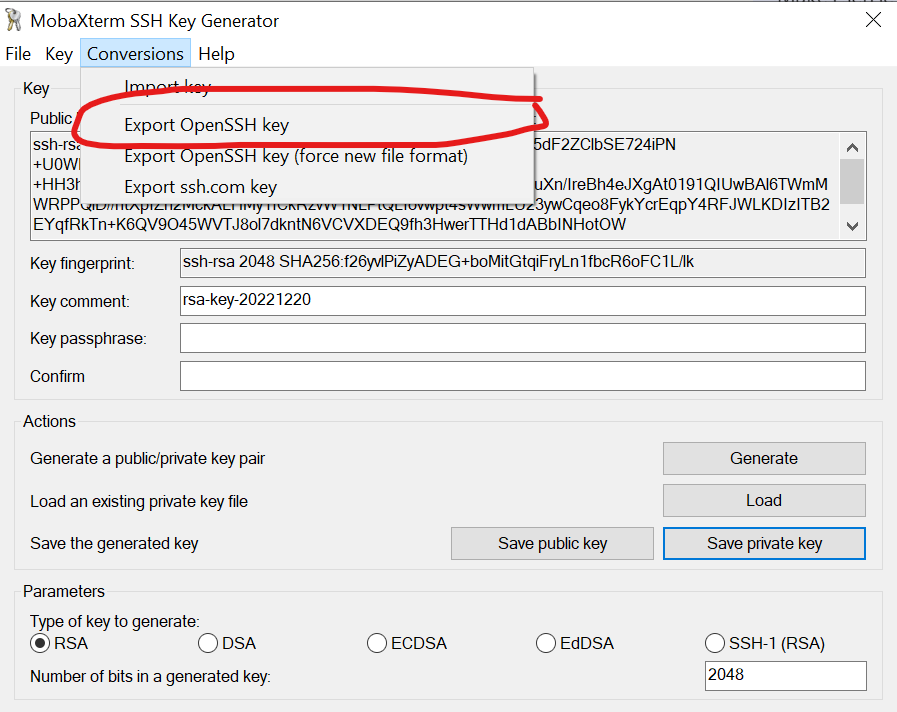
-
Mounting of Home and Scratch can be done through the command prompt or with the Windows File Explorer once WinFsp and SSHFS-Win are installed.
- Mounting Home directory with the command prompt. Note the '.k' after sshfs (
\\sshfs.k\) indicates key authentication should be used- DriveLetter (H: or Z: etc.) is optional, but username is required
- Command structure
C:\>net use [DriveLetter:] \\sshfs.k\<username>@rsync.hpcc.msu.edu - example
C:\> net use F: \\sshfs.k\ryanjos2@rsync.hpcc.msu.edu
- Mounting Scratch directory with the command prompt requires a slightly different command. Note the addition of '.r' to sshfs (
\\sshfs.kr\) that designates to start from the root directory.- DriveLetter (H: or Z: etc.) is optional, but username is required
- Command structure
C:\>net use [DriveLetter:] \\sshfs.kr\<username>@rsync.hpcc.msu.edu\mnt\gs21\scratch\<username> - example
C:\>net use R: \\sshfs.kr\ryanjos2@rsync.hpcc.msu.edu\mnt\gs21\scratch\ryanjos2
- Mounting Home or Scratch directory with Microsoft file browser:
- Both Home and Scratch use the same steps, just with different network paths
- Home:
\\sshfs.k\username@rsync.hpcc.msu.edu - Scratch:
\\sshfs.kr\username@rsync.hpcc.msu.edu\mnt\gs21\scratch\username
- Home:
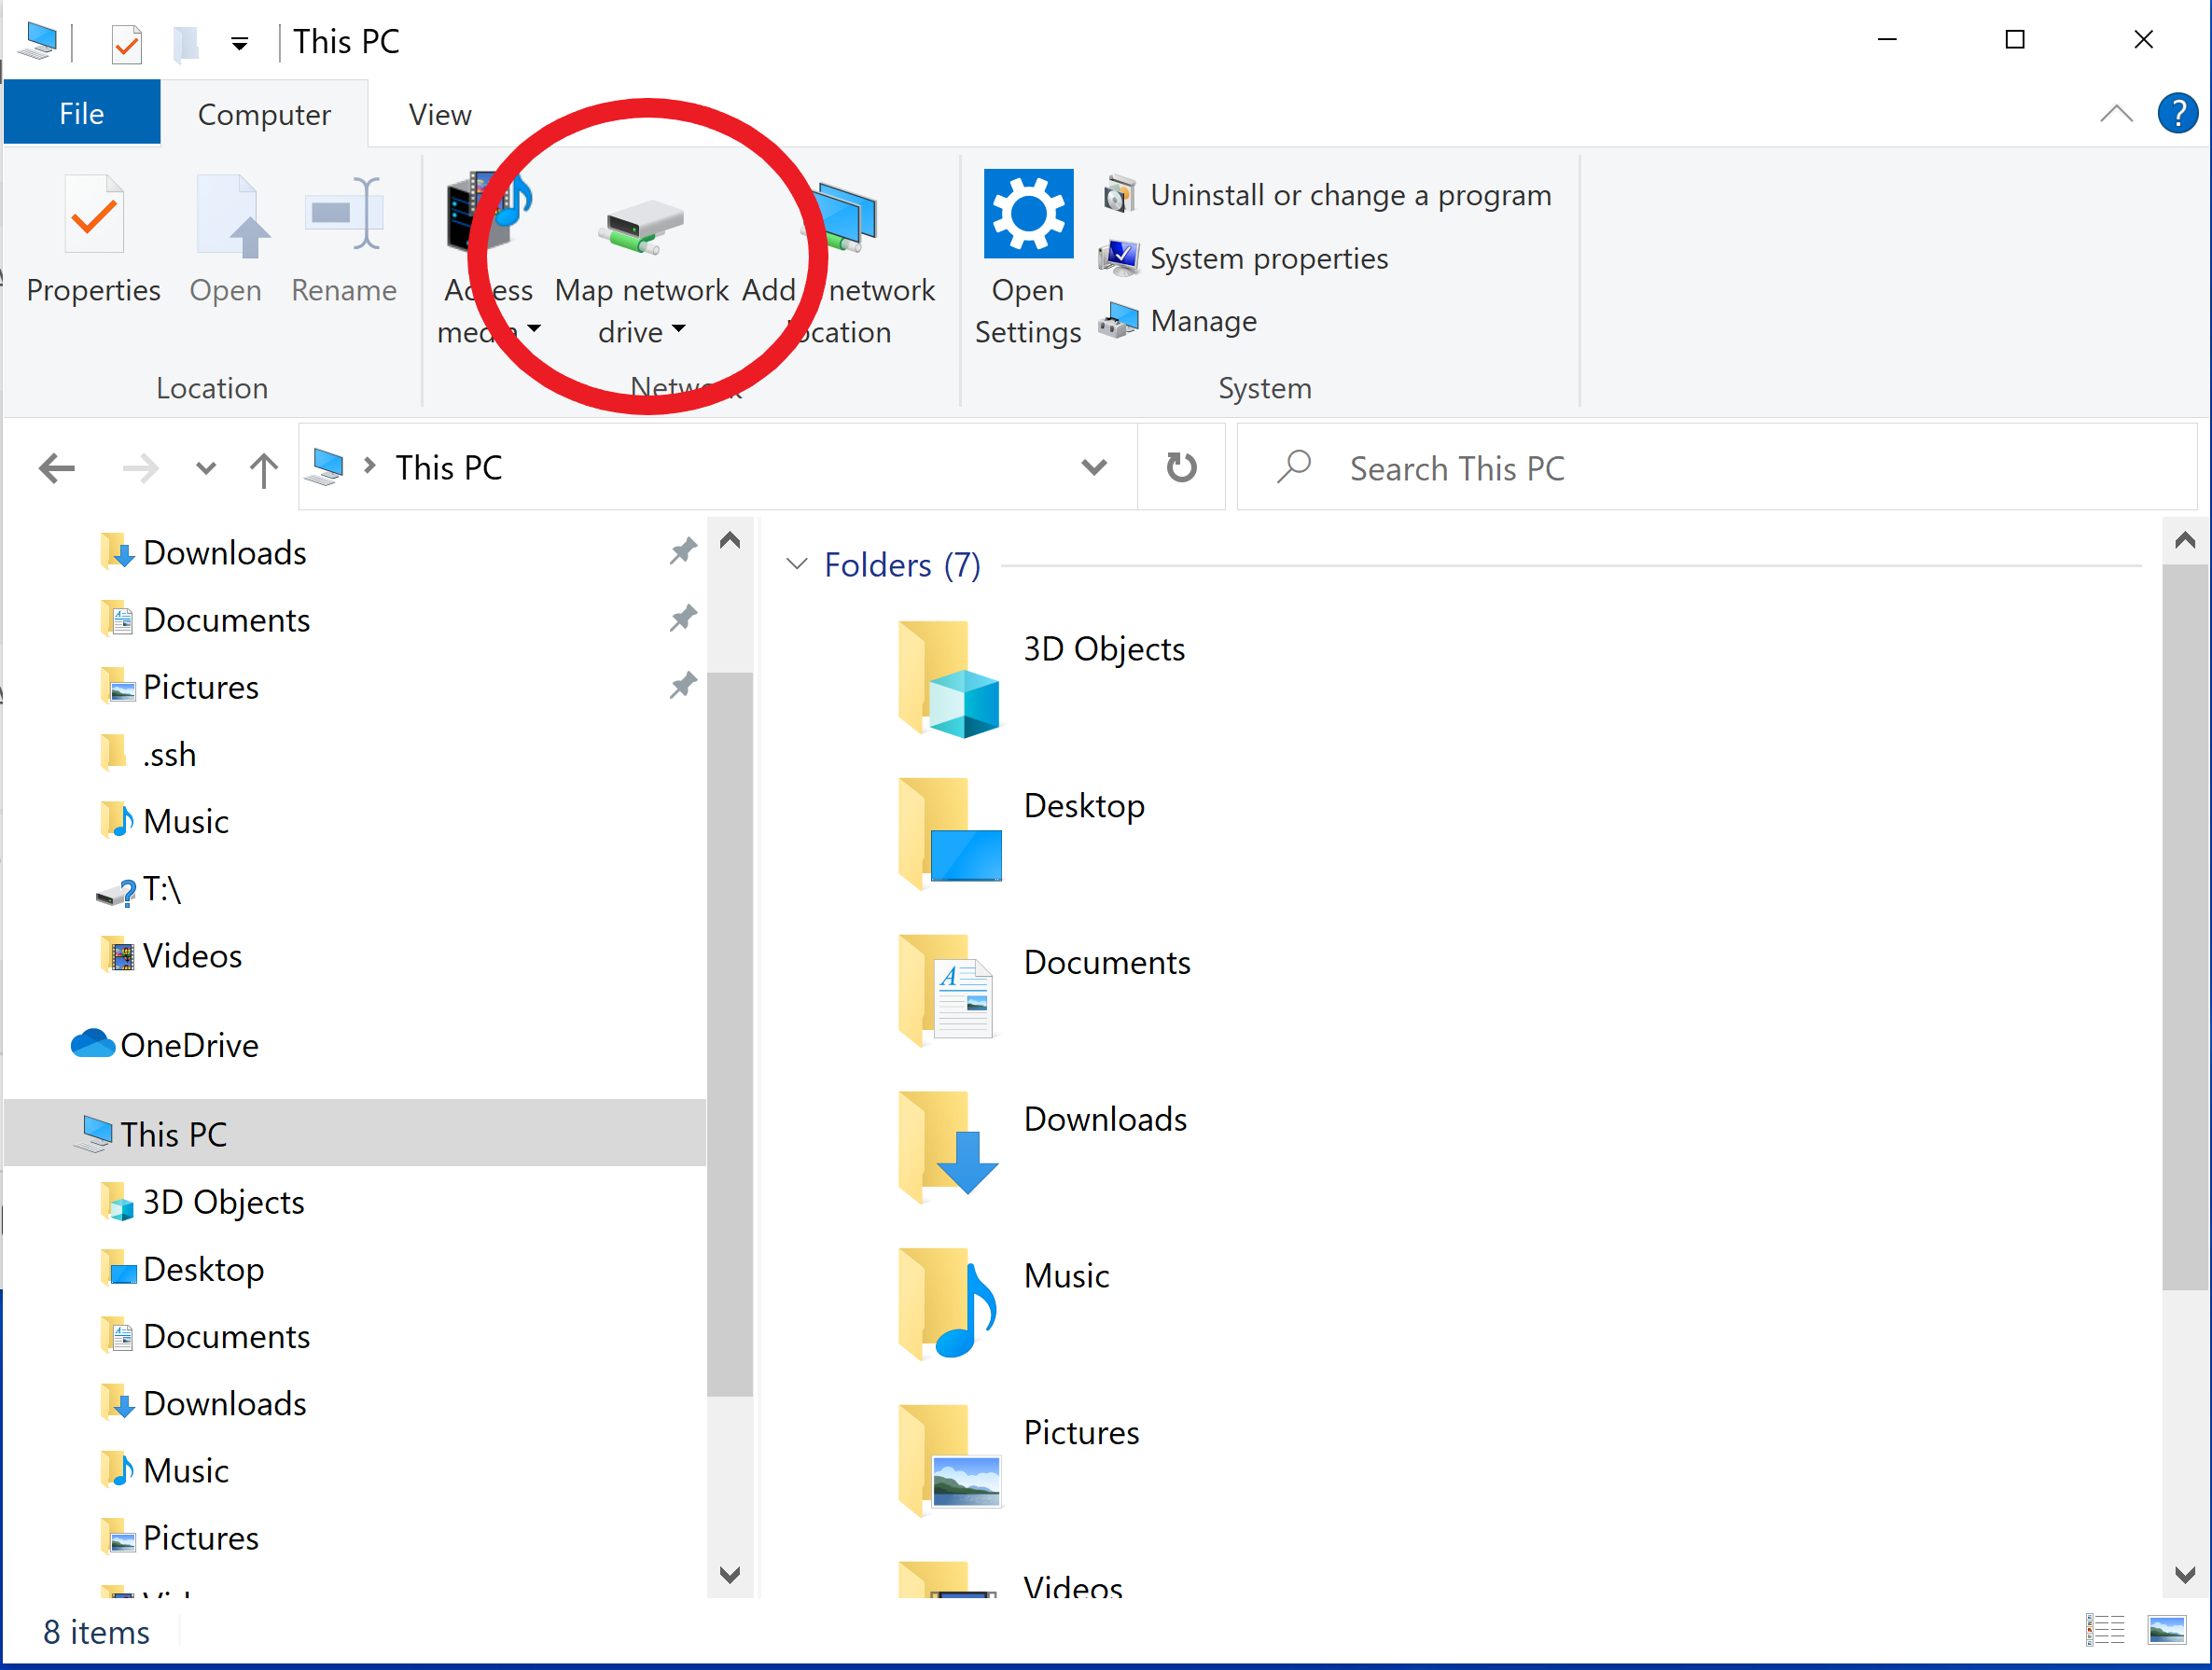
- In file browser on the 'This PC' page, select 'Map Network Drive'
- Fill in the appropriate network path (
\\sshfs.k\username@rsync.hpcc.msu.edu), select a drive letter and any desired options, and click Finish.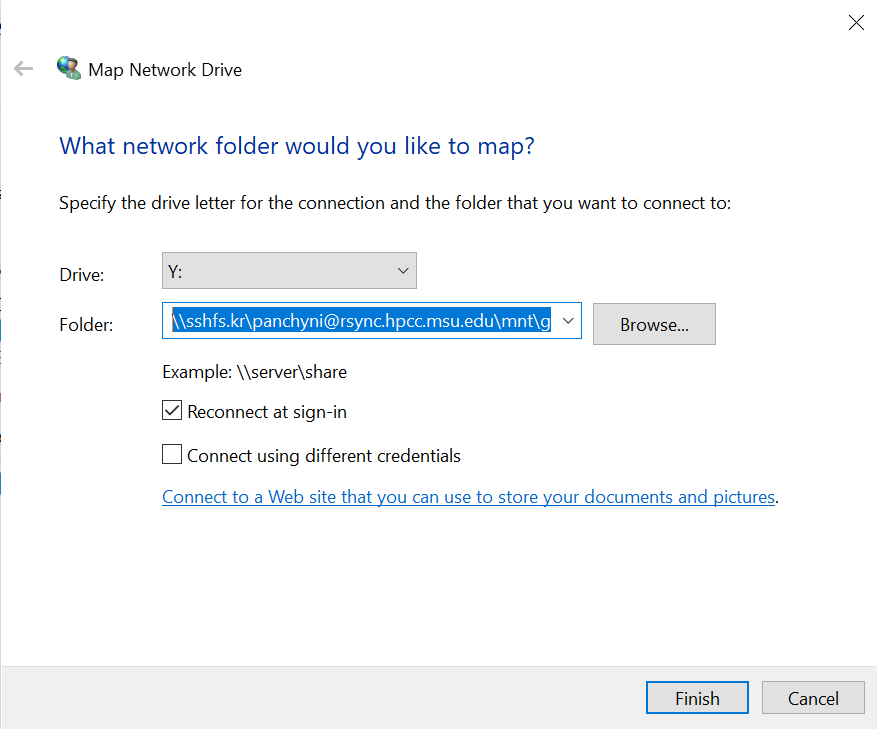
- Both Home and Scratch use the same steps, just with different network paths
- Mounting Home directory with the command prompt. Note the '.k' after sshfs (
-
Mounting a research space required an additional tool, the SSHFS-Win Manager GUI. However, SSHFS-Win Manager GUI does not work properly with SSH key authentication so this is not longer supported with SSHFS.